Sheet metal bending with a press brake might seem straightforward, but common myths surrounding press brake tooling often lead to confusion and inefficiency. It can be hard to know what's true about optimal tool usage. Let's debunk six key press brake tooling myths that might be slowing metal workers down, and reveal how knowing the truth can boost productivity and lead to better results.
Press Brake Tooling Myths #1: Needing Separate Tools for 90°/Offset Bends
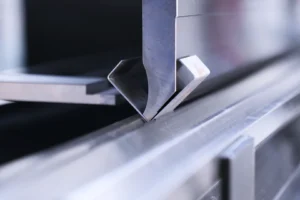
This isn't always the case. You can sometimes modify a standard die by grinding away part of its back side. This change lets you make two bends close together, facing opposite ways, using the same tool. It creates space for the metal flange made by the first bend. This trick also lets you make sharp (acute) angle bends, 90-degree bends, and offset bends without handling the part multiple times (see Figure 1).

There are a couple of limits, though. First, you can only grind the die back to a certain point (where the curve of the V-opening meets the flat top). Second, the metal sheet gets pulled into the die as you bend it, using up some material. So, this won't work for very tiny offsets (like bending the metal just its own thickness apart), but it often works great for medium or larger offsets.
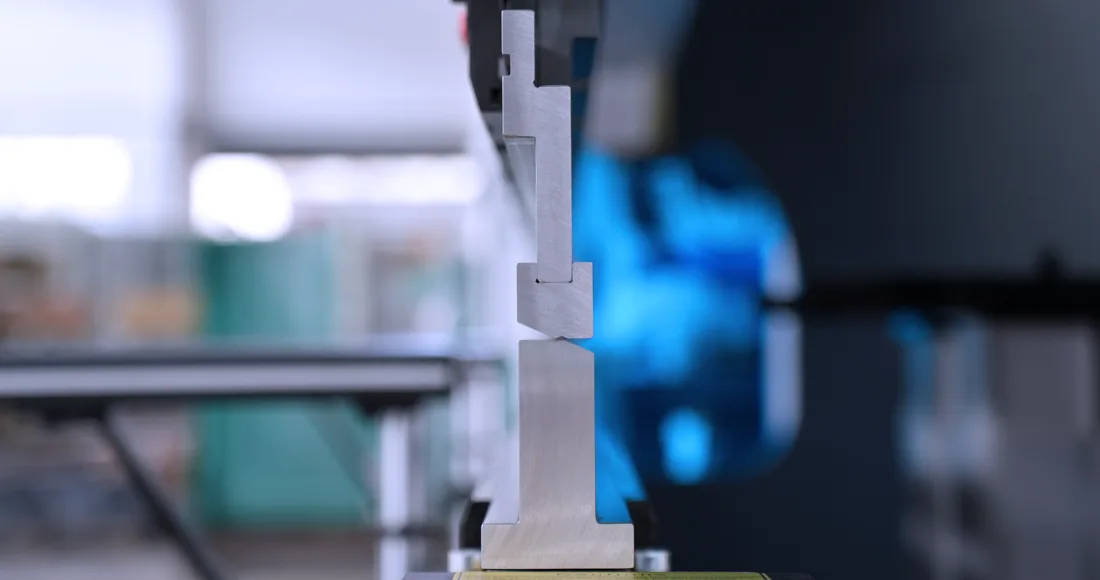
Myth 2: Never Use Punches and Dies With Different Angles
People used to believe this, especially with older press brakes from before the year 2000. Back then, many machine controls would sound an alarm if the punch's angle was wider than the die's V-opening angle. The machine would stop, thinking the tools might crash.

Things have changed. Today, you usually don't need to match the punch and die angles exactly (see Figure 2). Matching them actually makes the die less useful. What really matters now is how far the punch tip can go past the top corners (shoulders) of the die opening before hitting anything.
The main limit now is the punch tip's own angle. If your punch tip has an 86-degree angle, you can't bend metal to an angle smaller than 86 degrees without a crash. This applies to any punch with an angle wider than the die's V-opening.
Not needing to match angles opens up possibilities, especially with dies made for sharp (acute) angles. For example, if you usually air bend 90-degree angles in thinner steel, stainless steel, or aluminum (like 10-gauge or less), you can use common punches (with 86, 80, or 75-degree tips) with a 30-degree die. If you later need to make sharper angle bends, you just need to get a sharp-angle punch. You don't need a whole new set of dies. This can save you a lot of tool changes and money.
Myth 3: Shorter Tools Are Always Cheaper
Yes, a short punch (like 4 inches tall) costs less than a taller one (like 6 or 8 inches) right now. This saves money upfront. But, if you're a shop that makes parts for different customers, you'll likely need to buy that same punch profile in a taller size later on. This happens when a job requires bending a part that your short punch can't clear. Even companies making their own products often run into this.
When you buy a short punch and then buy a tall version later, you've basically paid for the same tool twice and probably wasted money.

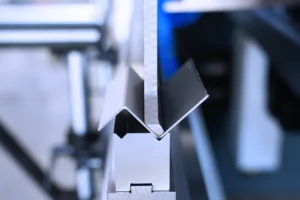
Taller punches give you more ability to make tall or deep parts. Think about boxes with four sides or deep U-shaped channels with long sides (see Figure 3).
Of course, taller punches use up more of the press brake's "open height" (the space between the machine's top and bottom beams when fully open). You generally want at least 4 inches (100 mm) of working space between the punch and die. This makes it easy to handle the part during bending and remove it afterwards. Deep parts might need much more space.
Dies around 2.165 inches (55 mm) tall work well for many jobs and cost less than taller dies. If your press brake has enough open height, you can always add taller dies (like 4 inches or 100 mm) when needed. Just make sure you have enough working space before buying them.
If your press brake has a very large open height (like 23 inches or 600 mm or more), you'll probably need taller punches and dies just to reach each other. Remember to budget for these more expensive tools when buying a machine like this. Still, these big machines, combined with tall punches (6 inches, 8 inches, or more) and tall dies (4 inches or more), offer amazing flexibility.
Myth 4: You Don't Need Coining Anymore
This is simply not true. Modern CNC press brakes are great at "air bending" (where the punch pushes the metal into the die V but doesn't fully bottom out). Air bending is fast, efficient, and flexible. But sometimes, "bottom bending" (pushing a bit harder) and "coining" (stamping the metal very hard with matched tools) are still necessary.
Think about a company that wanted to bring back an old product line. They wanted everything exactly the same as decades ago, including inside bend corners that were "as sharp as possible."

The expert suggested air bending tools that would create inside bend corners roughly as round as the metal's thickness. Surprisingly, the company said those corners would be too big! Because the original products were made long ago, they used tools designed for coining. Back then, coining was the only way to get the needed accuracy and look (see Figure 4).
Air bending has many advantages. But sometimes, like when you need bend corners sharper than the metal's thickness, air bending just won't work. Keep this in mind when you buy your next press brake. Also, think about the customers you work for now and the types of customers you want to attract later.
Myth 5: You Can't Air Bend Small Corners (Radii)
Actually, you can, but it depends on how small you need the inside corner (radius) to be (see Figure 5). When air bending mild steel or soft aluminum in common thicknesses (gauge sizes), you can get inside corners almost as sharp as the material's thickness. You do this by using a die with a V-opening that's about six times wider than the material thickness.

For example:
- Bending 16-gauge mild steel (about 0.060 inches thick) in a 0.394-inch (10 mm) V-die gives an inside corner radius of about 0.066 inches.
- Bending 12-gauge mild steel (about 0.105 inches thick) in a 0.630-inch V-die gives an inside corner radius of about 0.105 inches.
To most people, an air-bent corner with a radius equal to the material thickness looks quite sharp. Companies that need sharp corners often accept these, especially if it means they don't have to buy expensive coining tools or worry about the high forces coining requires.
While this works well for thinner mild steel and soft aluminum (best results with 12-gauge and thinner), it gets trickier with thicker metal. As metal gets thicker, the outside of the bend stretches more, which can cause thinning or even cracking.
Some shops successfully bend hot-rolled steel up to about 3/16 inch (0.188 in. or 4.8 mm) thick using a V-opening six times the thickness. Success here depends on using good quality metal and trying to bend across the metal's grain direction instead of along it.
Myth 6: You Can Use One Punch Tip to Bend Almost Anything
After spending a lot of money on a fancy press brake, people often try to save money on tools. They try to use just one or two punch sizes (with only one or two tip radius options) for everything. This can actually cost more in the long run.
When you constantly put too much force on a punch tip radius, it starts to wear down much faster than normal. This is even worse when bending rough materials like hot-rolled steel, sheets with holes (perforated), parts with sharp edges (burrs), or strong materials like stainless steel.

As punch tips wear down, tiny cracks can form on the tip where it touches the metal (see Figure 6). These cracks spread, and the tip might get flat spots. This affects your bending accuracy and means you'll need to replace the damaged punches sooner.
Here are some good guidelines for choosing the punch tip radius (PTR) based on mild steel thickness:
- 22-gauge to 11-gauge: Use a PTR of 0.030 in. to 0.039 in. (about 1 mm).
- 10-gauge to 1/4 inch (0.250 in.): Use a PTR of 0.125 in. (about 3 mm).
- 1/4 inch (0.250 in.) to 1/2 inch (0.500 in.): Use a PTR of 0.236 in. to 0.250 in. (about 6 mm).
Avoiding the pitfalls highlighted by Press Brake Tooling Myths involves not just correct usage but also proper tool care. Choose quality Press Brake Tooling—punches from good steel, precisely ground, hardened. Keep tips clean and rust-free. Most importantly, operate within force limits. This ensures your investment in Press Brake Tooling lasts, with quality punches often performing well for 10-12 years, regardless of workload.