Press Brake bend radius, bend deduction, bend allowance, and K factor are important parameters in sheet metal processing.
Sheet metal processing is a comprehensive cold-working process for sheet metal materials (usually below 6mm).
Such as steel plates, aluminum plates, copper plates, and other metal plates.
Sheet metal processing techniques include shearing, punching/cutting/compounding, bending, folding, welding, riveting, splicing, forming (such as automobile body), etc.
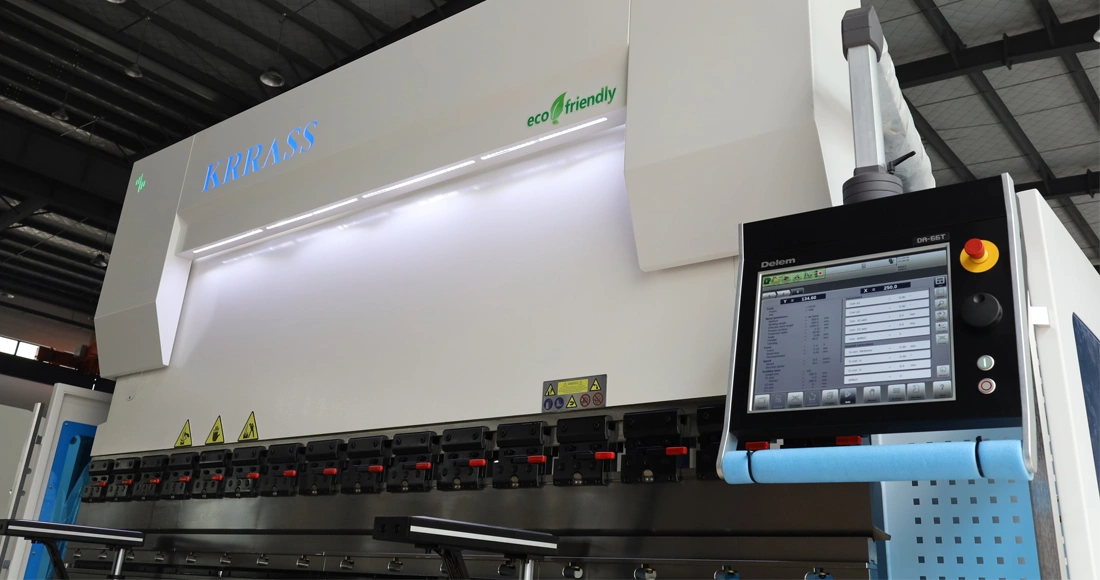
The remarkable feature of sheet metal processing is that the thickness of the same part is consistent.
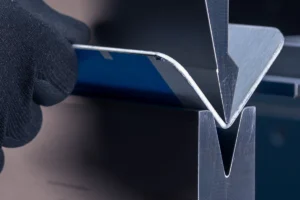
Sheet metal bending refers to the processing of changing the angle of sheet metal. Example, bending the sheet into a V shape, U shape, etc.
Generally, there are two ways to sheet metal bending:
One method is died bending, which used for sheet metal structures with complex structures, small volumes and mass processing.
The other is bending by the press brake, which used to process sheet metal structures with large structure sizes or small output.
What Is the Sheet Metal Bend Radius?
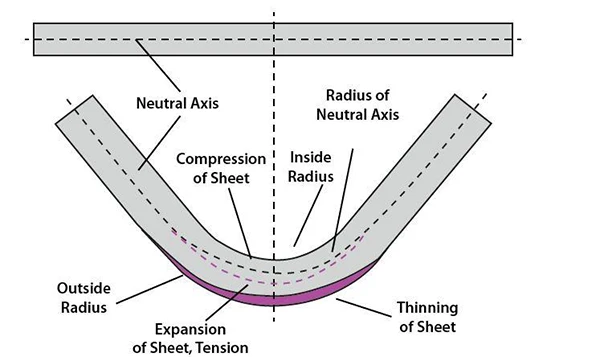
When the material is bent, the outer layer is stretched, and the inner layer is compressed in its fillet area. When the thickness of the material is constant, the smaller the inner radius, the more serious the tension and compression of the material. When the tensile stress of the outer fillet exceeds the ultimate strength of the material, cracks and fractures will occur. The tensile strength and bending radius of metal materials affect the bending quality of the workpiece. Therefore, the structural design of the bending workpiece should avoid using too small a bending fillet radius.
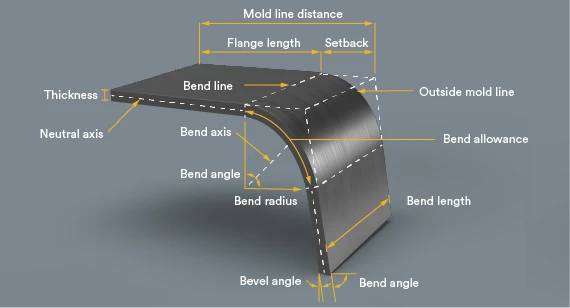
The bending radius usually refers to the distance from the bending axis to the plate surface when bending metal plates, bars, etc., which is generally called the internal bending radius. The external bending radius is usually the sum of the internal bending radius and the sheet thickness.
Minimum Bend Radius Guidelines
Understanding the minimum bend radius is crucial. Below is a reference guide based on theoretical sheet metal gauge thicknesses:
Thickness of the sheet Minimum bend radius 1–6 mm 1 time the thickness of the sheet 6–12 mm 1.5 times the thickness of the sheet 12–25 mm 2-3 times the thickness of the sheet For specific thicknesses and materials, such as Steel 1.0038 / S235JR, it’s advisable to consult material-specific reference tables to ensure precision in your calculations.
What Determines the Sheet Metal Bend Radius?
Many factors affect the bending radius, including material strength, material thickness, lower die opening width, and tonnage. In the process of bending, the plate will produce compressive stress and tensile stress, which will also affect the bending radius.
When the plate is bent, the inner side of the neutral axis is compressed, and a force resisting compression will be generated in the plate. When the outside of the neutral axis is stretched, a tensile resistance force will be generated in the sheet. When the workpiece is taken out, the residual compressive stress and tensile stress will cause the material to spring back, making the bending angle larger.
The greater the hardness and thickness of the material, the greater the spring back, which requires over-bending to obtain a smaller angle than expected. In air bending, the inner radius is about 16% – 20% of the width of the die opening. For example, the common 60 KSI cold rolled steel is about 16%, and the stainless steel is 20%. Generally speaking, if the material thickness is less than 6mm, the inner radius is equal to the material thickness. The larger the opening of the V-shape die, the larger the bending radius. On the same V-shape die, the greater the tensile strength of the material, the greater the inner radius.
Understanding Bend Orientation Rules for Sheet Metal
When designing sheet metal parts, one crucial aspect that can’t be overlooked is the orientation of bends.
Efficient Bend Orientation
Aligning bends correctly can significantly reduce both time and costs. For optimal efficiency, ensure that bends originating from the same plane are oriented in a uniform direction. This strategic orientation minimizes the need for repositioning the part during production.
Consistency in Bend Radius
Another critical factor is maintaining a consistent bend radius throughout your design. This consistency allows all features to be manufactured using the same setup and tooling, resulting in cost savings.
Impact of Sheet Thickness
Bend accuracy is essential, and there’s a direct relationship between precision in bending and the thickness of the sheet metal. Thinner sheets allow for greater precision in bends, so consider reducing sheet thickness if high accuracy is a priority.
Practical Example
Imagine a design scenario where you have a 1mm thick sheet. Ensuring that all bends have the appropriate radius and are consistently oriented can greatly enhance both efficiency and quality of the final product. By applying these principles, manufacturers can streamline their production processes and achieve better results.
By keeping these rules in mind, you can improve the manufacturability and efficiency of your sheet metal projects.
What are some examples of minimum bend radius reference tables for different materials like steel and aluminum?
When working with materials like steel and aluminum, knowing the minimum bend radius is crucial for ensuring the material does not crack or become compromised. Here’s a guide to help you understand the minimum bend radius for various sheet metal thicknesses, specifically referencing steel and aluminum.
General Guidelines for Minimum Bend Radius
- 1–6 mm Thickness: The minimum bend radius is typically equal to the thickness of the sheet.
- 6–12 mm Thickness: Expect the minimum bend radius to be about 1.5 times the sheet’s thickness.
- 12–25 mm Thickness: Here, the bend radius can range from 2 to 3 times the thickness.
These general rules can vary depending on the specific material properties, so it’s always important to refer to material-specific data.
Steel Example: S235JR (Steel 1.0038)
For a common structural steel like S235JR, the minimum bend radius may be detailed like this in reference tables:
- 1–3 mm Thickness: Minimum bend radius = 1 x thickness
- 3–8 mm Thickness: Minimum bend radius = 1.5 x thickness
- 8–15 mm Thickness: Minimum bend radius = 2 x thickness
Aluminum Example
Aluminum generally features different bending behavior due to its distinct properties compared to steel. For aluminum, reference tables often suggest:
- 1–4 mm Thickness: Minimum bend radius = 1 x thickness
- 4–10 mm Thickness: Minimum bend radius = 2 x thickness
- 10–20 mm Thickness: Minimum bend radius = 2.5 – 3 x thickness
Always consult specific reference tables provided by material manufacturers like Alcoa or ArcelorMittal for precise measurements and recommendations. These tables are crucial in guiding fabrication processes and ensuring product quality and safety.
How Bend Orientation Impacts Sheet Metal Fabrication Costs and Efficiency
When it comes to sheet metal fabrication, the orientation of bends plays a pivotal role in influencing both cost and efficiency. Aligning bends consistently improves the manufacturing process significantly, leading to economic and time-saving benefits.
Cost Reduction through Uniform Bend Radius
- Tooling Consistency: By maintaining a uniform bend radius, manufacturers can utilize the same setup for multiple features. This reduces the need for switching tools frequently, saving on both material and labor costs.
- Standardization of Processes: Using a consistent bend orientation allows for a standardized approach in production. This minimizes errors and reduces wastage, further cutting down expenses.
Efficiency Boost in Fabrication
- Streamlined Production: Consistent bends ensure a smoother workflow. With fewer interruptions to change tooling or recalibrate machines, production speed increases.
- Simplified Quality Control: Uniform bend orientations make quality control processes more straightforward. It becomes easier to inspect for imperfections, enhancing the overall reliability of the products.
In summary, thoughtful consideration of bend orientation not only slashes costs through streamlined processes and standardized tooling but also enhances the efficiency of sheet metal fabrication, ensuring a more reliable and quick production cycle.
Press Brake Bend Radius Calculation
The 8 rule is a rule of thumb applicable to the V-shape die opening, which means that the V-shape die opening should be 8 times the material thickness. There is no perfect sheet metal bend radius formula, but within the specified bending force range, the inner radius roughly equal to the plate thickness can be calculated. Of course, the change in material thickness will affect the accuracy. Some V-shapes die openings are 6-12 times the material thickness.
The thickness of the material is closely related to the inner radius of the bending. When the material thickness is less than 6mm, the inner radius of bending is equal to the material thickness. When the material thickness is greater than 6mm but less than 12mm, the inner radius of bending is generally 1.5 times the material thickness. When the material thickness is less than 12mm, the inner radius of bending is approximately 3 times the material.
This is just a rule of thumb. There are too many factors that affect bending, so it is difficult to be 100% correct. When the thickness of the sheet is equal to the bending radius, the most perfect bending radius will be generated. The bending state generated by this radius is very stable, its bending angle and size are consistent, and the spring back generated is the least.
Why Seek Expert Advice in the Initial Design Phase of Sheet Metal Machining?
When embarking on a sheet metal machining project, consulting with industry experts from the start can be a game changer. Here’s why:
- Optimize Design for Precision: Expert input ensures that your design adheres to essential specifications like the bend radius. This is crucial, as even minor miscalculations can lead to inaccuracies. Therefore, their guidance helps in crafting a precise part right from the beginning.
- Avoid Costly Mistakes: By getting advice early on, potential design flaws are addressed before they lead to expensive production errors. Expert insights can preempt issues such as material wastage and the need for redesigns, saving both time and resources.
- Enhance Material Efficiency: Specialists can recommend the best materials and processes tailored to your design, ensuring material is used efficiently and the performance of the final product is maximized.
- Stay Updated with Industry Standards: Industry norms and technology are constantly evolving. Experts keep you aligned with current standards, helping you leverage the latest techniques for better outcomes.
- Streamline the Production Process: By incorporating expert advice, the transition from design to production becomes seamless. This helps in maintaining a smooth workflow, reducing lead times, and ensuring quicker delivery of the finished product.
In essence, partnering with experts during the initial design phase is a strategic move that leads to more accurate, cost-effective, and timely production.
Conclusion
Bend radius is an important factor in sheet metal bending, and the proper inner radius determines the bending quality of the workpiece. Through the inner radius, we can also calculate important parameters such as bending allowance and bending deduction. Improper inner radius will lead to deformation or even fracture of the workpiece.
Moreover, maintaining a consistent bend radius across all bends offers significant advantages in the manufacturing process. By standardizing the bend radius, production costs can be reduced because all features can be created with the same setup and tooling. This consistency not only streamlines operations but also enhances efficiency, as it minimizes the need for frequent adjustments and tool changes.
Ultimately, by ensuring a uniform bend radius, manufacturers can achieve higher quality outcomes while simultaneously optimizing production costs and time.
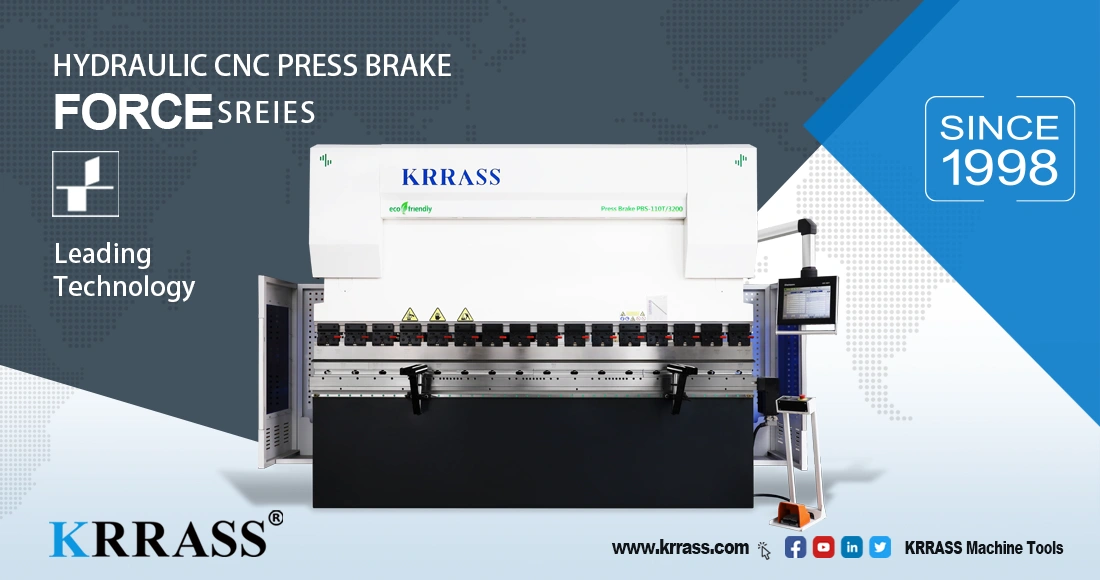
The use of the KRRASS press brake can help you to manufacture more precise workpieces, and you can contact us to learn more about the press brake.
FAQs
What Is the Minimum Bend Radius of Sheet Metal?
When designing sheet metal parts, attention to the minimum bend radius is crucial. It plays a vital role in ensuring the integrity and accuracy of the final product. The minimum bend radius impacts the stress distribution during bending, which in turn affects the part’s performance and durability.
If the bend radius is smaller, the stress on the outside of the bend will be greater, leading to potential deformation, cracks, or breakage during bending. To avoid these problems, attention should be paid to the minimum bending radius. Due to different bending methods, die, and material characteristics, different workpieces may have different minimum bending radii, and it is difficult to calculate the correct value. However, to obtain the most perfect bending workpiece, the inner radius should be set as close to the plate thickness as possible.
Moreover, selecting plates with high ductility is essential since materials with greater tensile strength and hardness require a larger radius. Because of these complexities, expert advice is recommended, even from the initial design phase. This ensures that the correct minimum bend radius is factored into the design, resulting in accurate parts and avoiding unnecessary expenses.
Understanding these nuances and incorporating them into the design process not only enhances the quality of the part but also contributes to cost-efficiency and optimal performance.
What Is the Formula for Bend Deduction?

The bend deduction is the amount that the sheet is stretched during bending. Its value is the difference between the total length of the flange and the total flat length.
Learn more about our products, please visit and subscribe to our Youtube channel
